Although I like all of the ring bases I buy, I do have my favorites.
You may be asking, "what's the difference?"

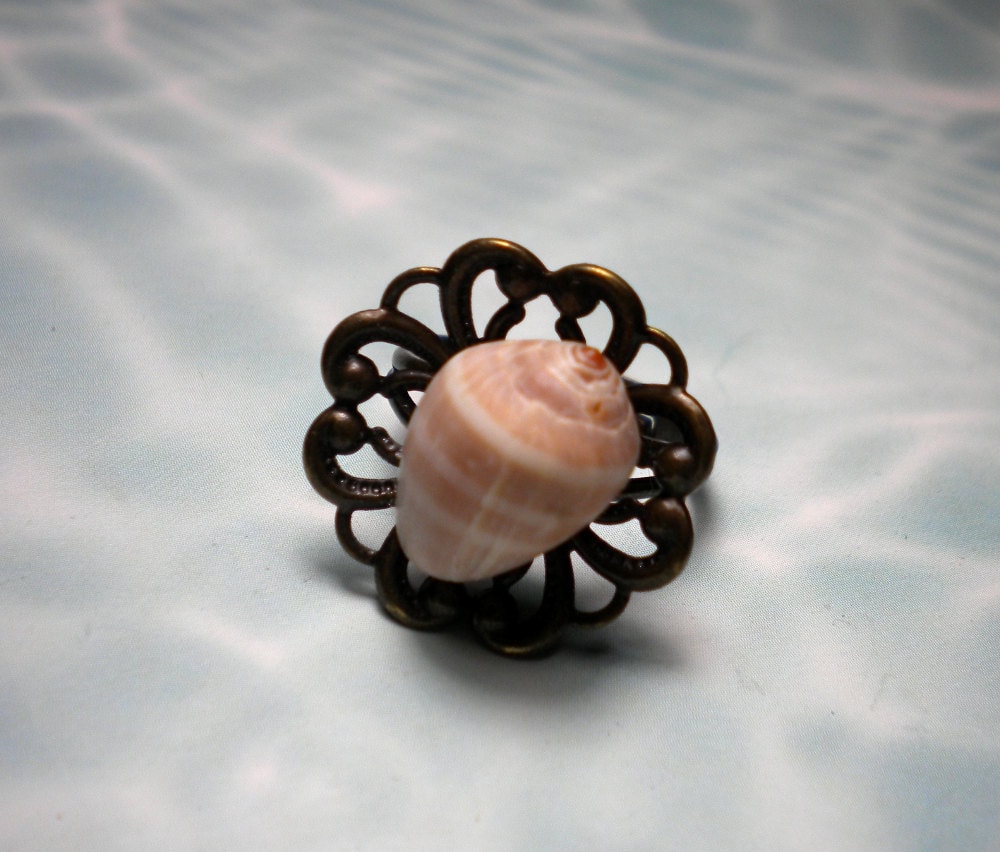
These are really pretty open filigree, and are very thin and lightweight.

Easily adjustable.
But these...

these are my favorite ring bases! They are heavier and strong, and take some force to adjust the size.

Can you see the difference in the thickness? I bought three color variations this time :)

The black one isn't painted, it's powder coated! Powder coating is harder, and much tougher than paint.
Bicycle frames and appliances are powder coated. Sometimes my husband sends fencing materials to be powder coated, and that's how I knew what it was. When I saw that these black ring bases were powder coated, I bought them without hesitation. I can't wait to pull out my mini shells and play with these!
I already played with the others last week ;)

I like, okay I LOVE the finished look of the filigree ring bases. I do know how to wire wrap rings... I've made a few. But as far as a complete and finished ring go, I like using ring bases better :D They have a more 'high end' look to them.
So, that is one of the things I'll be working on this week, the rose stem rings! My favorite ring bases!
Shae says Thank You ALL for the birthday wishes!


Edited 5 hours later to add:
I was supposed to announce a WINNER today! OMG I am sooooo sorry!
I'll do it tomorrow, I promise....I need to unearth my brain from wherever I've lost it in this craft room.
You may be asking, "what's the difference?"
These are really pretty open filigree, and are very thin and lightweight.
Easily adjustable.
But these...
these are my favorite ring bases! They are heavier and strong, and take some force to adjust the size.
Can you see the difference in the thickness? I bought three color variations this time :)
The black one isn't painted, it's powder coated! Powder coating is harder, and much tougher than paint.
Bicycle frames and appliances are powder coated. Sometimes my husband sends fencing materials to be powder coated, and that's how I knew what it was. When I saw that these black ring bases were powder coated, I bought them without hesitation. I can't wait to pull out my mini shells and play with these!
I already played with the others last week ;)
I like, okay I LOVE the finished look of the filigree ring bases. I do know how to wire wrap rings... I've made a few. But as far as a complete and finished ring go, I like using ring bases better :D They have a more 'high end' look to them.
So, that is one of the things I'll be working on this week, the rose stem rings! My favorite ring bases!
Shae says Thank You ALL for the birthday wishes!
Edited 5 hours later to add:
I was supposed to announce a WINNER today! OMG I am sooooo sorry!
I'll do it tomorrow, I promise....I need to unearth my brain from wherever I've lost it in this craft room.